
After seeing this wonderful gallery on imgur, and having had some success in the past with vegetable gardening, I said the same five words that have so often lead me down the path of adventure and triumph: “How hard could it be?” I decided to set up a little hop yard next to our back deck – for the fragrance, and for home brewing and, of course, for the experience.
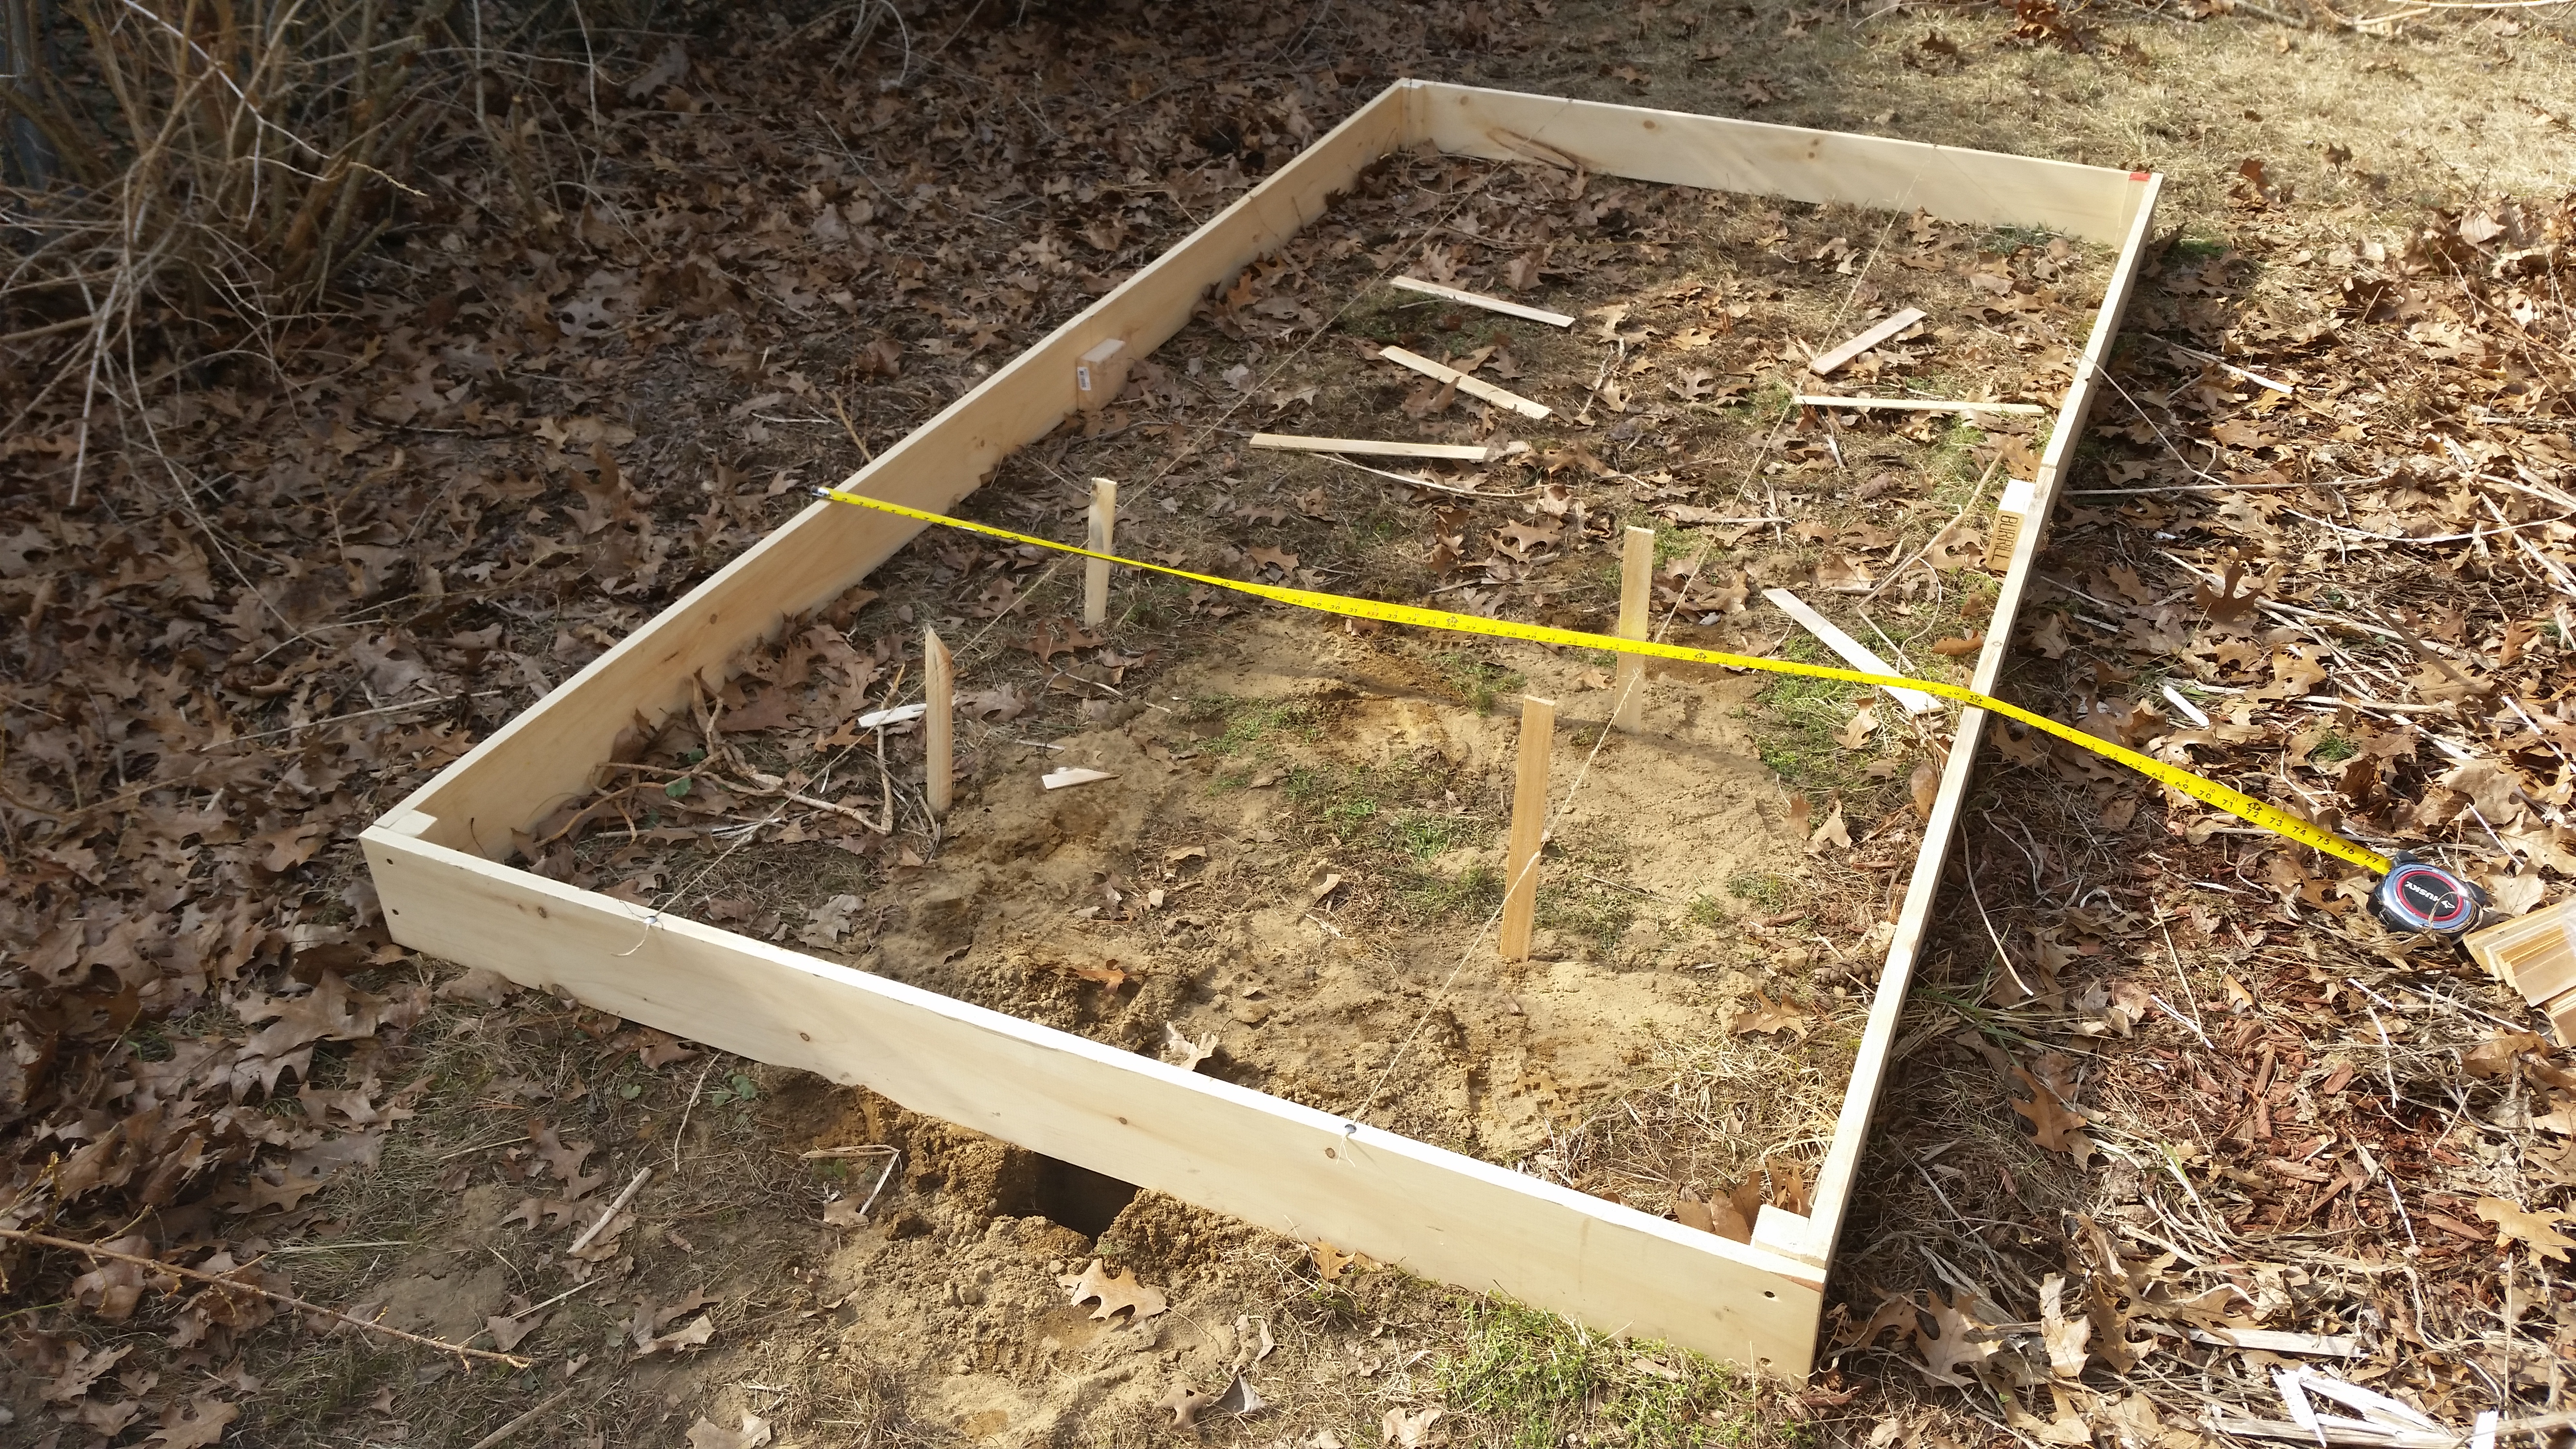
After selecting a suitable piece of the property, I mapped out the size I’d need for my incoming rhizomes – I had ordered ten, from two different suppliers, so a 10′ x 5′ rectangle was the smallest I could get away with. You can see here measuring and staking the location for each of the hop mounds. The box itself is just 1′ x 6′ boards cut to fit, with stakes in the corners. It’s roughly level. Roughly.
Following the staking came preparing the soil.  It turns out that at the time, the ground was frozen roughly ten inches below the surface. This made digging and preparing the bed a bit more complicated, and meant I couldn’t fertilize quite as much as I’d have liked. The real problem was that our compost was just one huge frozen cube of garbage, so these are only fertilized with organic synthetic fertilizer. I used a technique called bastard trenching, which is essentially the lazy man’s double-digging.
 Following the digging and fertilizing, I laid down what felt like five or six layers of cardboard and newspaper – probably four or five months worth of old packages, coupon
booklets, etc. These will help to retain moisture in the bed, and, more importantly, retard weed growth. I’m not what you’d call an enthusiastic weeder.
 Once all of that is down and roughly in place, I put together what’s called a drip irrigation system – you can see the final result here – the big idea is that once it’s properly dialed in, it will run on a timer and water the bed without any intervention on my part. Yes, I sprang for the timer that can detect a rainy day and change its behavior, because who doesn’t want that?

Following the irrigation, I threw down some nice red playground mulch. This will also help to retain moisture and continue to keep things ship shape, but more importantly, it is aesthetically a lot nicer than a big wooden box of trash sitting in the back yard.
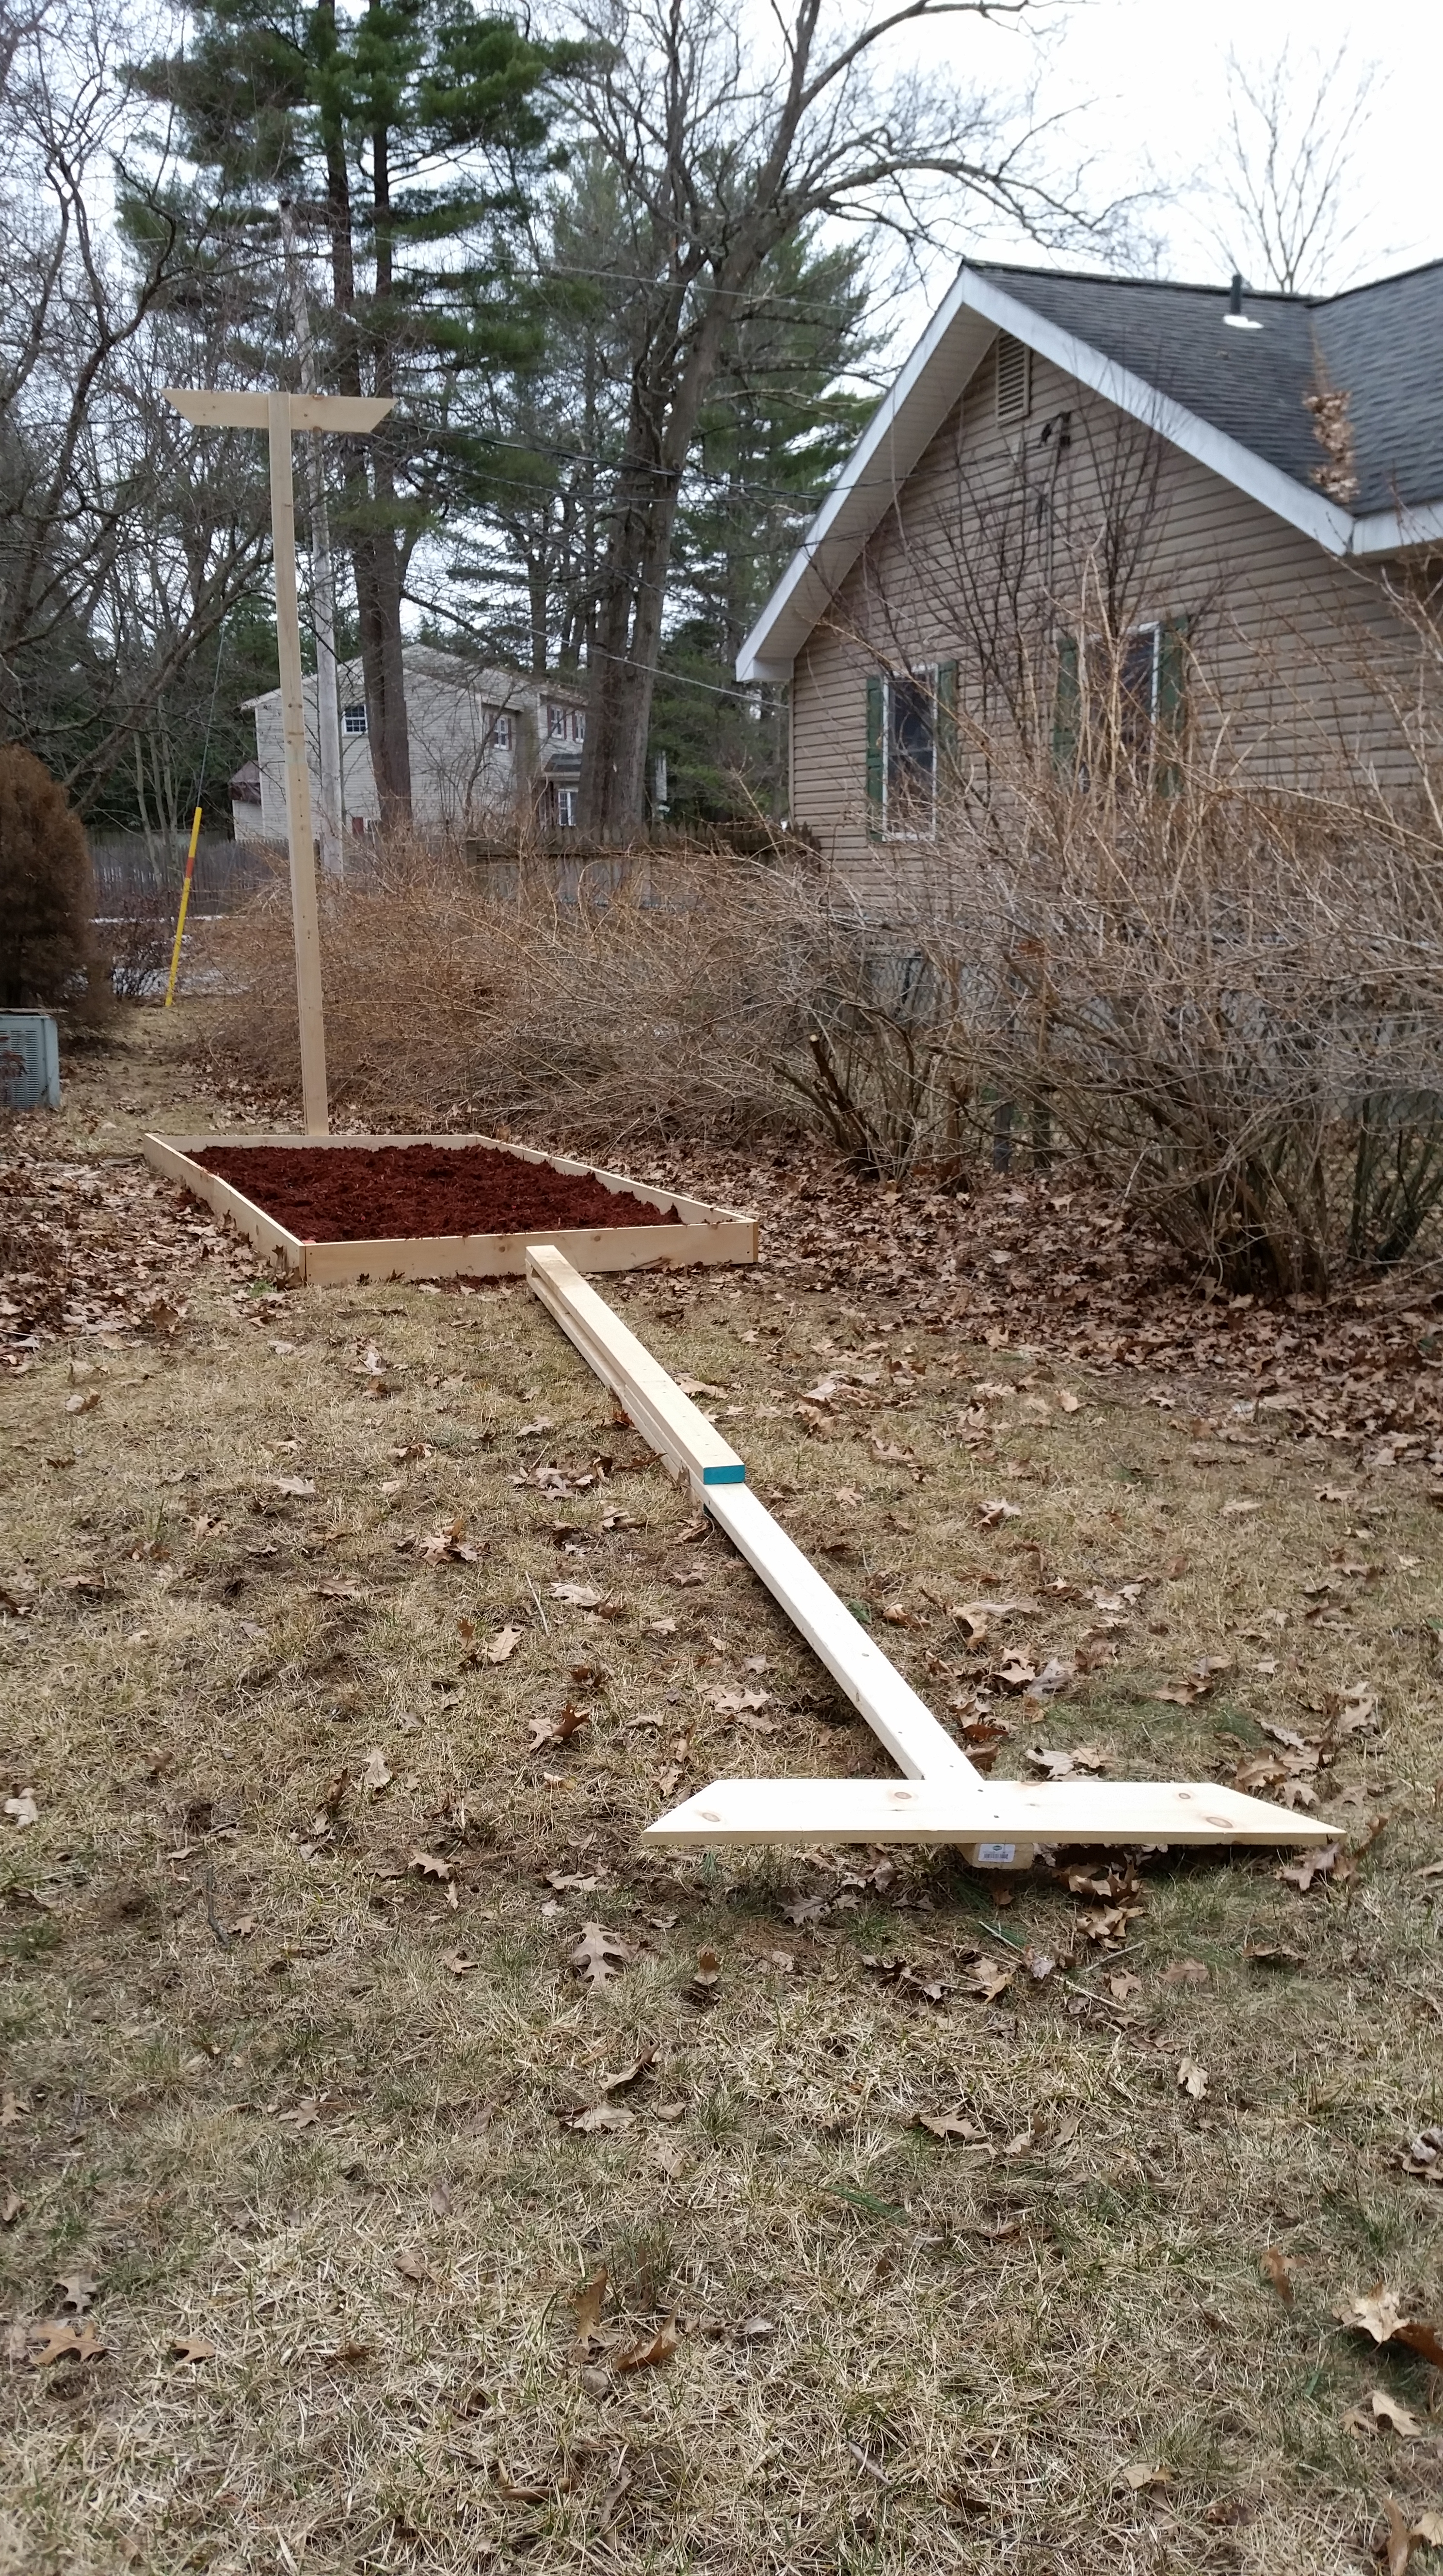
Once the mulch was down, it was time to put up the posts for the supporting lines for the hops themselves – I used three 2’x4’s along with a cut 1′ x 6′ across the top, dropping them two feet into the ground and stamping it tight. These are actually, in-fact, honestly level, since they would look insane if they weren’t.
Over the next few weeks, I need to run some steel cable between the posts, and run some clothesline from the cable down to each of the hop mounds. Until then, I’ll be keeping a close eye on the rhizomes, and hoping for the best!
